Thursday, August 1, 2013

Best Ribs Ever!

I love ribs.  Who doesn't?  Last night, my sister Andrea asked me how I make ribs.  And I realize that I don't make ribs, my husband usually does.  Then I remembered the ribs my mother made.  They are my Aunt Connie's recipe and I always loved them!  My sister said that if I found the recipe she would make them for us today.  Well, I found the recipe and emailed it to her right away!  They are so good and I always thought that they must be very time consuming and difficult to make.  Not the case!  They couldn't be any easier.  Why haven't I been making them all these years?!  Now I will.

Now, the ingredient that makes these ribs so special is Sambuca.  We are Italian, and that's how we roll.  For those who have never had Sambuca, it is an Italian anise-flavored liqueur.  Anise has a licorice flavor.  I know, many people don't like the flavor of licorice, but these ribs do not have a strong licorice flavor.  They are so good--you have to try them!  Don't be afraid-try them!


Ingredients:

4 pounds pork spare ribs
3 tablespoons Sambuca
1/4 cup soy sauce
2 tablespoons white vinegar
2 cloves of garlic, crushed
1/4 teaspoon pepper

That's it!

Cut the spare ribs apart and marinate them in the remaining ingredients.  You can place everything in a ziplock bag and marinate them in the refrigerator over night.


After the ribs are done marinating, arrange them in a shallow pan lined with foil.  Pour all that delicious marinade over the ribs so that they can cook in all that flavor.  Cover the pan with foil and bake at 375 degrees for 1 1/2 hours.

This is what they look like after baking 1 1/2 hours


After 1 1/2 hours, remove the foil and continue baking uncovered at the same temperature for another 30-45 minutes.  We baked them 45 minutes then put them under the broiler for 5 minutes to get them all caramelized.  Here is the finished product.

Mmmmm!

Friday, June 28, 2013

Mom's Artichokes

In our house, we never had stuffed artichokes. My mom simply cooked them in a pot with very few ingredients.  If you have never tried an artichoke this way, you should.  You really can enjoy the taste and texture of this vegetable. I can say hands down that artichokes are our favorite vegetable. Before I understood that the heart was the best part, my sister Patricia would con me out of it. Here is a tutorial that she created for Facebook on how to cook artichokes. 


Mom always said that April & September are artichoke season!
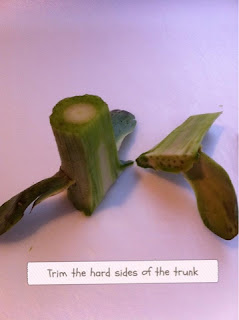
Yes, you can eat this & it is delicious!  It will get cooked in the bottom of the pot as you will see below.  We called it the "trunza" 
Yes-the "juice" is great over linguini or capellini & some Parmesan cheese...mmmm!
If you've never eaten an artichoke-scrape the leaves with your teeth.  You can eat most of the inner, softer leaves.  When you get to the heart, use a spoon to scrape out the "choke" (it looks like hairy, pinchy stuff) then eat the whole heart!  And don't forget to eat the trunza too!

Thursday, June 27, 2013

Mom's Manicotti

Happy Easter! It was in preparing for Easter that I decided to start this blog. I was longing for my mom's homemade manicotti & looked through my parent's recipes to find it. I had made the shells with her once many years ago & knew that they are pretty easy to make. Mind you, Italian cooking is very simple and true Italian cooks don't really have recipes written down. They just know how to cook. This was my grandmother's recipe that my mom had written down.  When I found it, I had to laugh. Here it is-


Can't get much more simple than that! Don't worry, I will explain it in more detail. Don't be intimidated! They are so easy to make & well worth the effort.

For the shells:

2 cups of flour
2 cups of water
3 eggs
1/4 tsp salt

Mind you, these are not those manicotti shells you buy in the pasta aisle of supermarket. These are the real deal. A true manicotti shell is really a crepe.

So, mix the three ingredients until there are no lumps. Lightly oil a small non-stick pan with vegetable oil.  When the pan is hot, pour about 1/2 cup of the batter in the pan & move it around until the batter covers the bottom of the pan.
When you see that the shell is almost cooked through & little bubbles form flip the shell over. It takes about 1-2 minutes each side. It should be a thin crepe...maybe about 1/4 inch thick .   Stack them on a plate with waxed paper in between each one. 
Ready to flip!
This is what the cooked shell should look like.
They can be made a day or two in advance. Store them stacked with the waxed paper in between each one in a Ziploc bag in the refrigerator. 
One recipe made 10 shells. 


Now for the filling:


This is enough filling for 20 shells. 

2 lbs ricotta

3 eggs

Parmesan cheese (I used @ 1/4 cup)
Fresh  parsley, chopped (I like parsley so I used 1/4 cup)
Salt/pepper to taste

  
Mix the above ingredients. When you are ready to assemble the manicotti, spread some homemade marinara sauce on the bottom of a large pan. Spread some filling down the center of each shell and fold the two sides up. Line them up pretty tightly with the seam side facing down in the pan. Spread sauce over the top of the shells, sprinkle with shredded mozzarella & Parmesan cheese. Cover with foil and bake in a 375 oven for 30 minutes. Remove foil & bake 5 more minutes. 
Here is the finished product.  Enjoy!